
Survey maps Wi-Fi readings: walk a floor plan or outdoor route, view a heatmap, compare walks and export. The Location tool and Location Readiness Report show what the phone and network say about where you are.
What you need
- iPhone, iPad or Android, and a connected sensor for Wi-Fi readings. Without a sensor, a walk records positions only.
- A floor plan image, or an iPhone or iPad with LiDAR (iPhone 12 Pro or a later Pro/Pro Max, or a LiDAR-equipped iPad Pro). Room scanning is iPhone and iPad only.
- For outdoor surveys, location permission. Precise location gives better positions.
How to walk a floor-plan survey
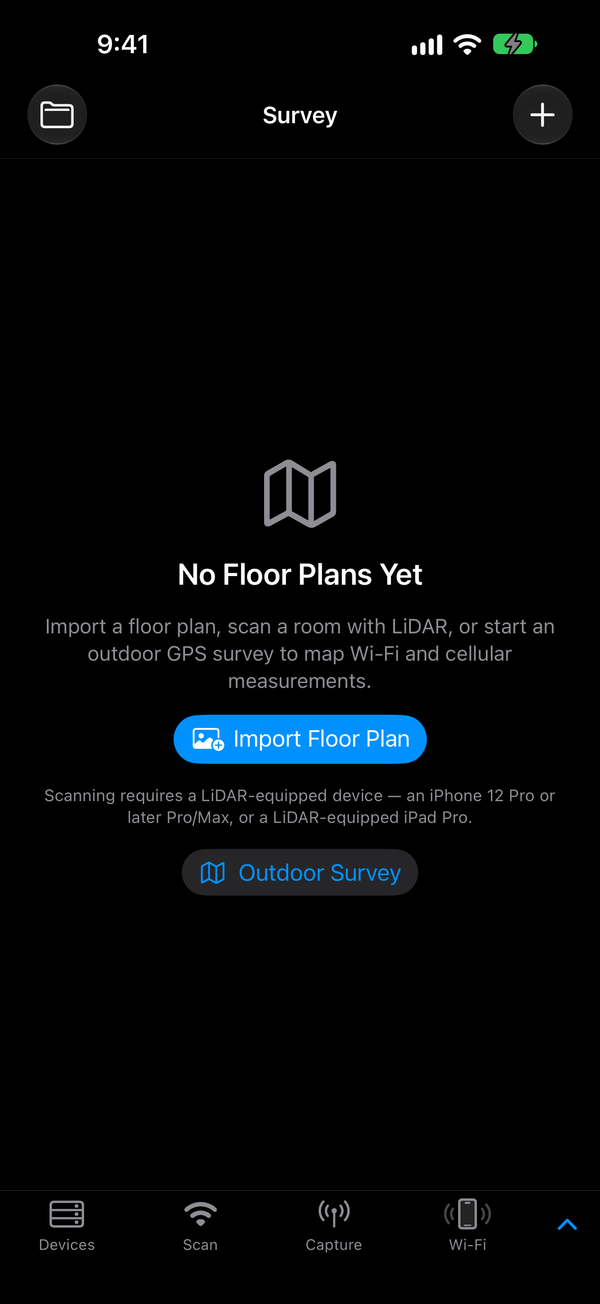
- Open Survey from the expanded tab bar.
- Import the plan. On iPhone, tap + › Import Photo (or Import Floor Plan when the list is empty). On Android, tap +. Choose an image.
- Set the scale. Tap Calibrate, then tap two points a known distance apart, such as both sides of a doorway. Enter the distance in Meters and tap Set Scale. Scale shows the result.
- Choose the Wi-Fi sensor. On iPhone, turn on Wi-Fi under the plan. The walk uses the device selected on Devices. On Android, tap the Wi-Fi chip, then Wi-Fi sensor: and pick a connected device.
- Tap Survey Walk. The panel shows the sensor and the channels it will sweep. If no sensor is set, iPhone offers Choose a Sensor. Tap Scan Settings to change channels or dwell.
- Tap Start. Each time you stop for a reading, tap your position on the plan. The waypoint count goes up.
- Tap Stop Walk.
- Change the heatmap. The map stays neutral until you pick a network. On iPhone, pick a network in Target, then a Metric: RSSI, SNR, Noise, Radio clients or Channel utilization. On Android, tap the target button, then the metric button (RSSI, SNR, Noise, Clients, Load). Survey details (iPhone) or Details (Android) shows statistics and an optional requirement.
- Export. On iPhone, tap … › Export Survey. On Android, tap More › Export Survey.
You get an
.openintent.zipfile. Generate Survey Report (iPhone) or Generate and Share Report (Android) makes a report instead.
How to scan a room with LiDAR
iPhone and iPad with LiDAR only.
- Optional: in Survey, tap + › Survey Modes and choose the Wi-Fi device. Its readings are recorded along your path.
- Tap + › Scan Room (LiDAR). Allow camera access if asked.
- Walk the room slowly, pointing the camera at walls and floor. Use Pause and Resume between areas. Keep the app open: leaving it ends the scan.
- Tap Done. The plan is saved already to scale, so you don't need to calibrate it. The app then builds a textured 3D model. Tap Skip 3D if you don't need it.
- In the plan, … › View Textured Scan shows the model. Exports offer Include Textured Scan.
How to survey outdoors with GPS
- On iPhone, tap Survey › + › Outdoor Survey. On Android, tap Outdoor in Survey.
- Choose what to record. On iPhone, turn on Wi-Fi and pick the Wi-Fi device. On Android, tap Wi-Fi, Cellular or Wi-Fi + Cellular and pick the device. On Android, tap Enable precise location if it appears.
- Tap Start survey (iPhone) or Start Survey (Android). Positions come from the phone's GPS.
- To drop a point, tap Add marker at current position (iPhone) or Mark Point (Android).
- Tap Stop & Save, then Export Survey. For raw data, use JSON, CSV and GeoJSON (iPhone) or Advanced Export: CSV / GeoJSON (Android).
How to compare with a previous survey
Finished walks on a floor plan, and outdoor surveys, are kept.
- Walk the same plan or route again, and pick the same network as the target.
- On iPhone, tap Compare a previous survey, choose one in Previous recording, and tap Compare selected target. On Android, open Details and tap a date under Compare previous survey.
- Read the median before and after. Only fresh readings of the same radio at nearby positions are matched.
How to check emergency-location readiness
The Location Readiness Report grades what nearby access points advertise about their location over ANQP: coordinates, a civic address, or a location URI.
- Connect a sensor and run a Passpoint scan with it (how).
- Without disconnecting, record a capture with the same sensor and stop it. The report is saved beside the capture if the scan found at least one access point.
- Open the capture. On iPhone, Files › On This Device › tap it. On Android, Files › tap it, or ⋮ › Properties.
- In Capture Properties, under Location Readiness, tap View Location Readiness Report.
- Read the Venue grade: Not Assessed, None, Geo Only, Civic Only, Geo + Civic or LIS URI. About This Report lists its limitations.
The Location tool
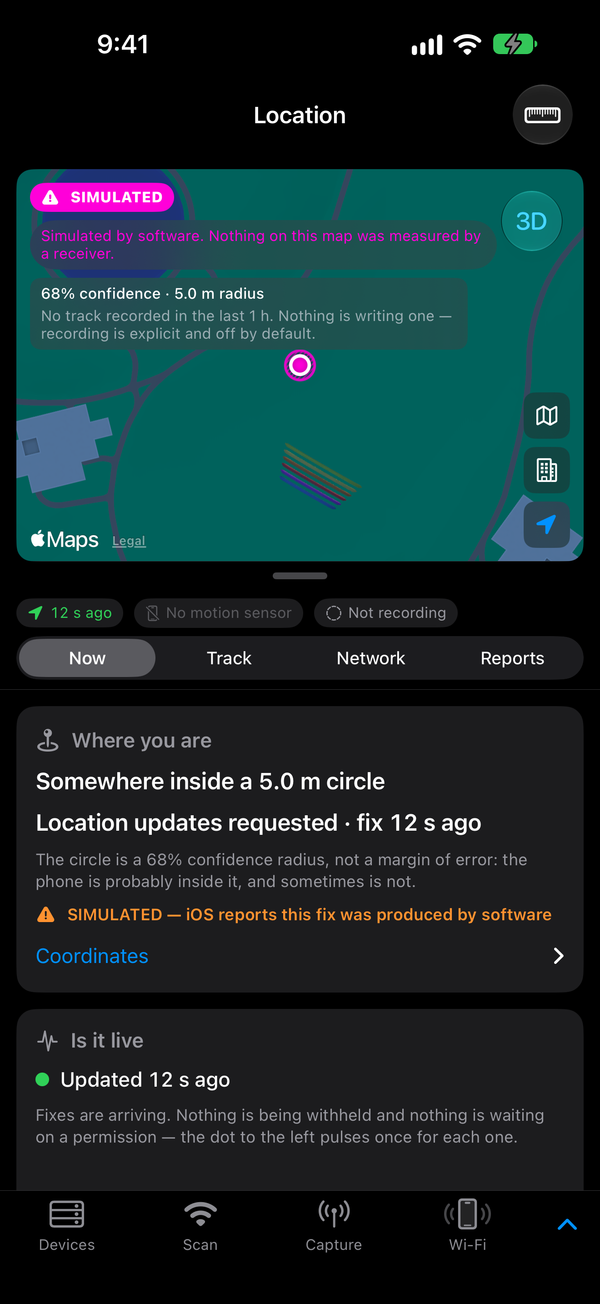
Open Location from the expanded tab bar. It has four lenses:
- Now: the phone's position, accuracy and motion.
- Track: a position history, recorded only after you tap Start recording (iPhone) or turn on the Recording switch (Android).
- Network: location that access points advertise, beside the phone's own. Scan AP location / FTM ranging (iPhone) is experimental.
- Reports: saved readiness reports with their grades. iPhone only; Android shows it as not built yet.
Tips
- One reading does not locate an AP. Antenna direction and your movement change what you measure.
- Walk at the sweep's pace. If the walk panel says the sweep is slower than walking pace, choose fewer channels or a shorter dwell.
- Calibrate before exporting. An export needs a real-world scale to place the walk.
- Note position quality. The outdoor survey warns when Precise Location is off or the phone reports a simulated location.
- The readiness report is a reconstruction. It grades what is observable. It places no call, contacts no emergency service, and certifies nothing. It is a local file, the feature sends nothing over the network, and emergency numbers and URIs are shown as plain text.
- Surveys identify places. Check them before you share them.
- Wi-Fi plus cellular outdoors with a Mudi 7 is experimental, and works only on its exact validated firmware, modem and support package. See Mudi 7.
If it doesn't work
| What you see | What to do |
|---|---|
| Scan Room (LiDAR) is greyed out | The device has no LiDAR. Import a floor plan image instead. |
| Couldn't Set Scale | Enter the distance as a number, such as 3.5, and check the two points. |
| Walk has positions but no Wi-Fi | No sensor was connected. Choose one and walk again. |
| Retry Wi-Fi during a walk | The sensor stopped sending readings. Tap it, or check Devices. |
| "Waiting for phone location fix…" (iPhone) | Move to open sky. Check Location Services for the app. |
| No Location Readiness section | Run a Passpoint scan with the same sensor before capturing. |
| Venue grade Not Assessed | No AP was assessed. Scan again closer to the access points. |
Related
Passpoint & authentication · Capture · Files and exports · Mudi 7 · iPhone & iPad · Android