Updated October 28, 2026. October 28 touchscreen firmware adds finite DFS radar repeat and one-tap attenuation presets. Screenless all-in-one remains on October 20. This installer supports ESP32-C5 only. Other ESP32 families are rejected.
Select your board
Built October 20, 2026 · Version 2026.10.20 · Experimental firmware. Select the exact model and flash capacity.
Use desktop Chrome or Edge and a USB data cable. Close serial monitors. The installer checks chip family, flash capacity and downloaded file hashes before writing, then verifies writes with device MD5.
Connecting reads the installed firmware identity when supported, and detects hardware specs if the board is already in download mode. To leave without flashing, close the dialog and tap RESET without BOOT. Unknown firmware is labeled unknown. Installation logs follow new output; scroll up to pause following. Open Logs & Console for the live serial console. Leave “Erase device” unchecked to preserve saved-device approval and settings when updating a compatible partition layout. If it does not appear in the port list, or the installer reports the wrong board or a connection error, put it into download mode by hand — see Recovery below.
Four tools, running on the touchscreen.
The scanner shows networks advertising the WFA HS2.0 vendor information element by default. Enable “Include Interworking-only” to include 802.11u Interworking advertisements too. An advertisement does not establish successful service authentication.
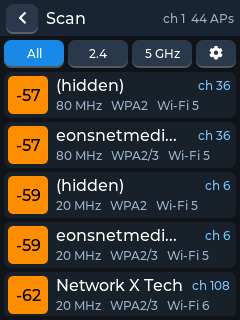
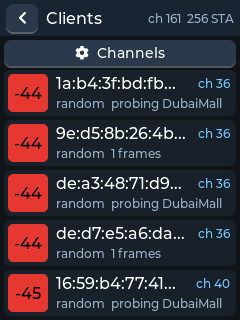
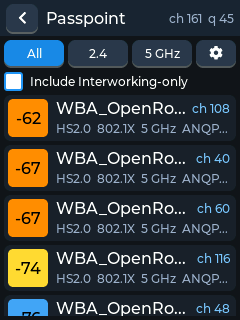
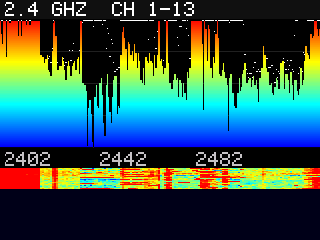
Actual screens from the physical 2.8-inch board on October 12, 2026. The video shows sequential captures of running tools, including 2.4 and 5 GHz spectrum. Spectrum levels are relative and uncalibrated.
Download the portrait demo video
After installation
Reconnect the board. Touchscreen boards open their launcher; screenless boards boot idle and connect through WLAN Commander.
Complete first-install parts
Screenless images have four parts; touchscreen images have five, including both launcher and sensor applications. Never use the application alone for a first install. Read release limits and manual installation.
WLAN Commander C5 All-in-One · Screenless · 8 MB (experimental) · built 2026-10-20
| Part | Offset | Bytes |
|---|---|---|
| bootloader.bin | 0x2000 | 22,080 |
| partition-table.bin | 0x8000 | 3,072 |
| ota_data_initial.bin | 0xe000 | 8,192 |
| wlc_sniffer_sdr.bin | 0x10000 | 1,260,768 |
Waveshare ESP32-C5-Touch-LCD-2.8 · 32 MB · built 2026-10-28
| Part | Offset | Bytes |
|---|---|---|
| bootloader.bin | 0x2000 | 23,168 |
| partition-table.bin | 0x8000 | 3,072 |
| ota_data_initial.bin | 0xd000 | 8,192 |
| wlc_touch.bin | 0x20000 | 2,791,552 |
| wlc_sensor.bin | 0x720000 | 1,296,880 |
Waveshare ESP32-C5-Touch-LCD-1.69 · 16 MB · built 2026-10-28
| Part | Offset | Bytes |
|---|---|---|
| bootloader.bin | 0x2000 | 23,168 |
| partition-table.bin | 0x8000 | 3,072 |
| ota_data_initial.bin | 0xd000 | 8,192 |
| wlc_touch.bin | 0x20000 | 2,797,344 |
| wlc_sensor.bin | 0x720000 | 1,305,424 |
Screenless C5 · 4 or 8 MB · legacy stable BLE sniffer · built 2026-09-07
| Part | Offset | Bytes |
|---|---|---|
| wlc_sniffer.ino.bootloader.bin | 0x2000 | 20,752 |
| wlc_sniffer.ino.partitions.bin | 0x8000 | 3,072 |
| boot_app0.bin | 0xe000 | 8,192 |
| wlc_sniffer.ino.bin | 0x10000 | 1,393,568 |
Recovery
If the board does not appear, or the installer reports the wrong board or a connection error, force ROM download mode by hand and retry: hold BOOT, press and release RESET, then release BOOT.
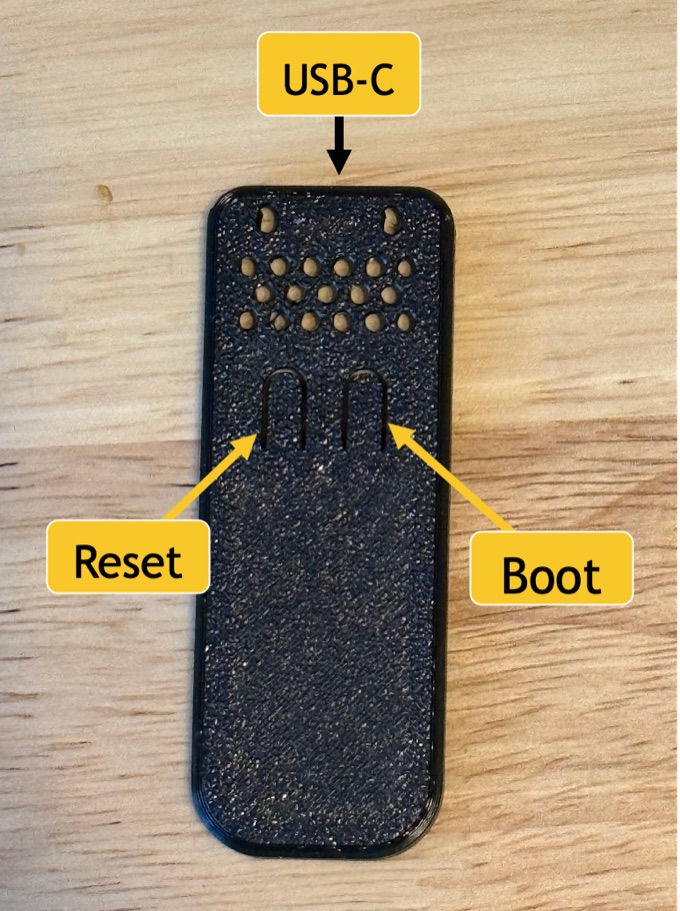
Use a USB data cable — not a charge-only cable — plugged directly into the computer, and close any serial monitor holding the port. Select only the matching C5 model and flash capacity: a 4 MB board cannot take the 8 MB all-in-one, so choose the legacy stable BLE sniffer for 4 MB boards. For the full list of flashing failures, see ESP32-C5 troubleshooting.